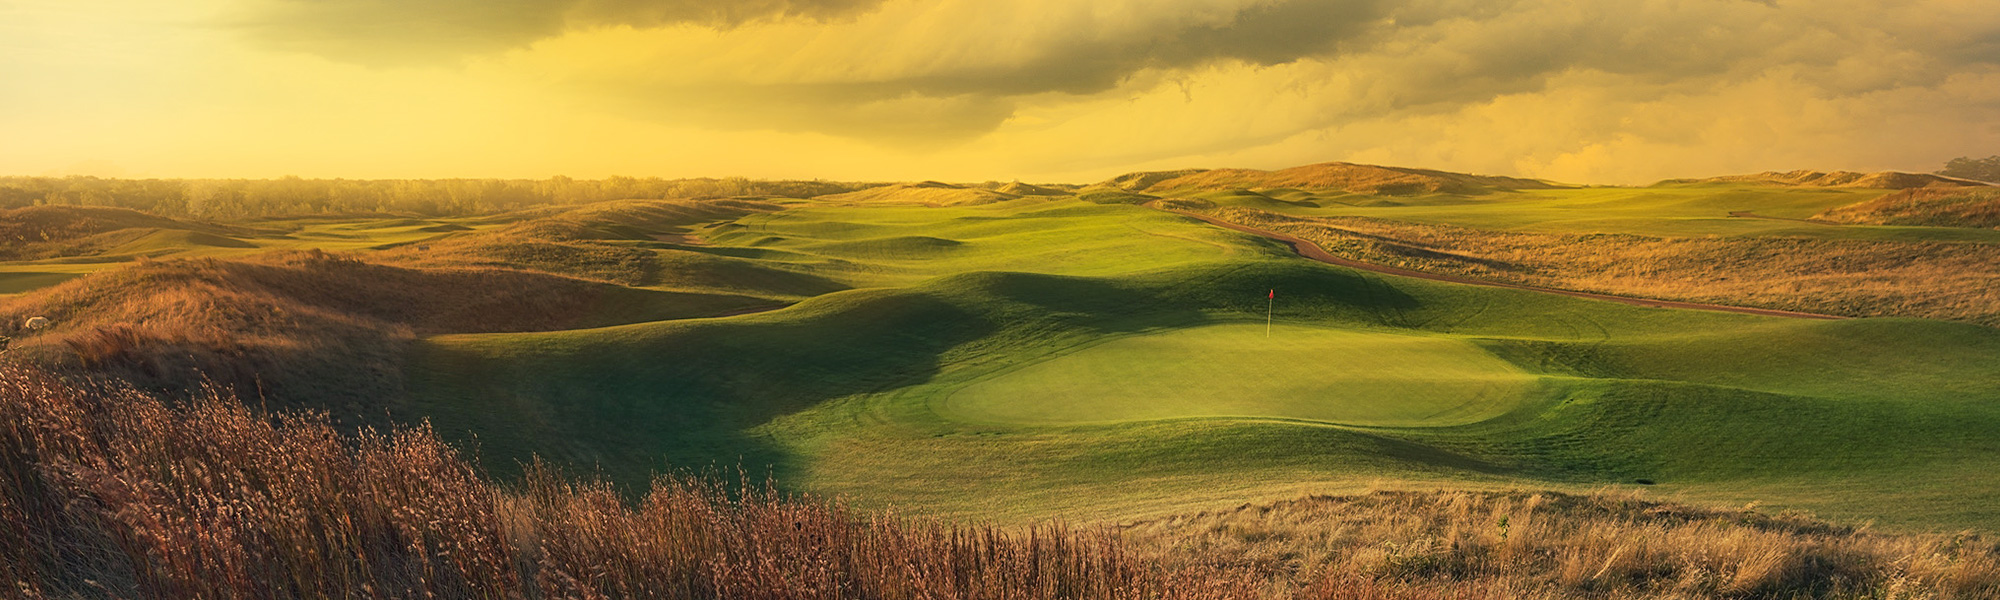
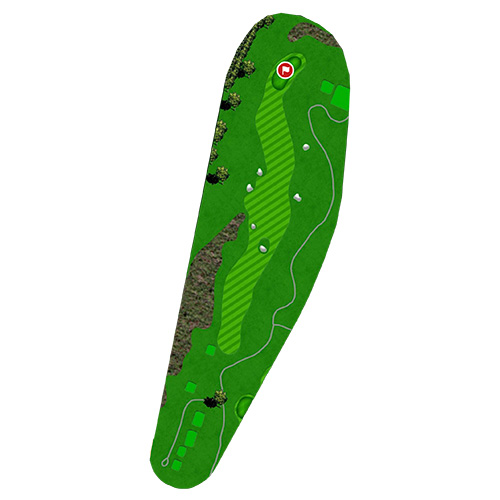
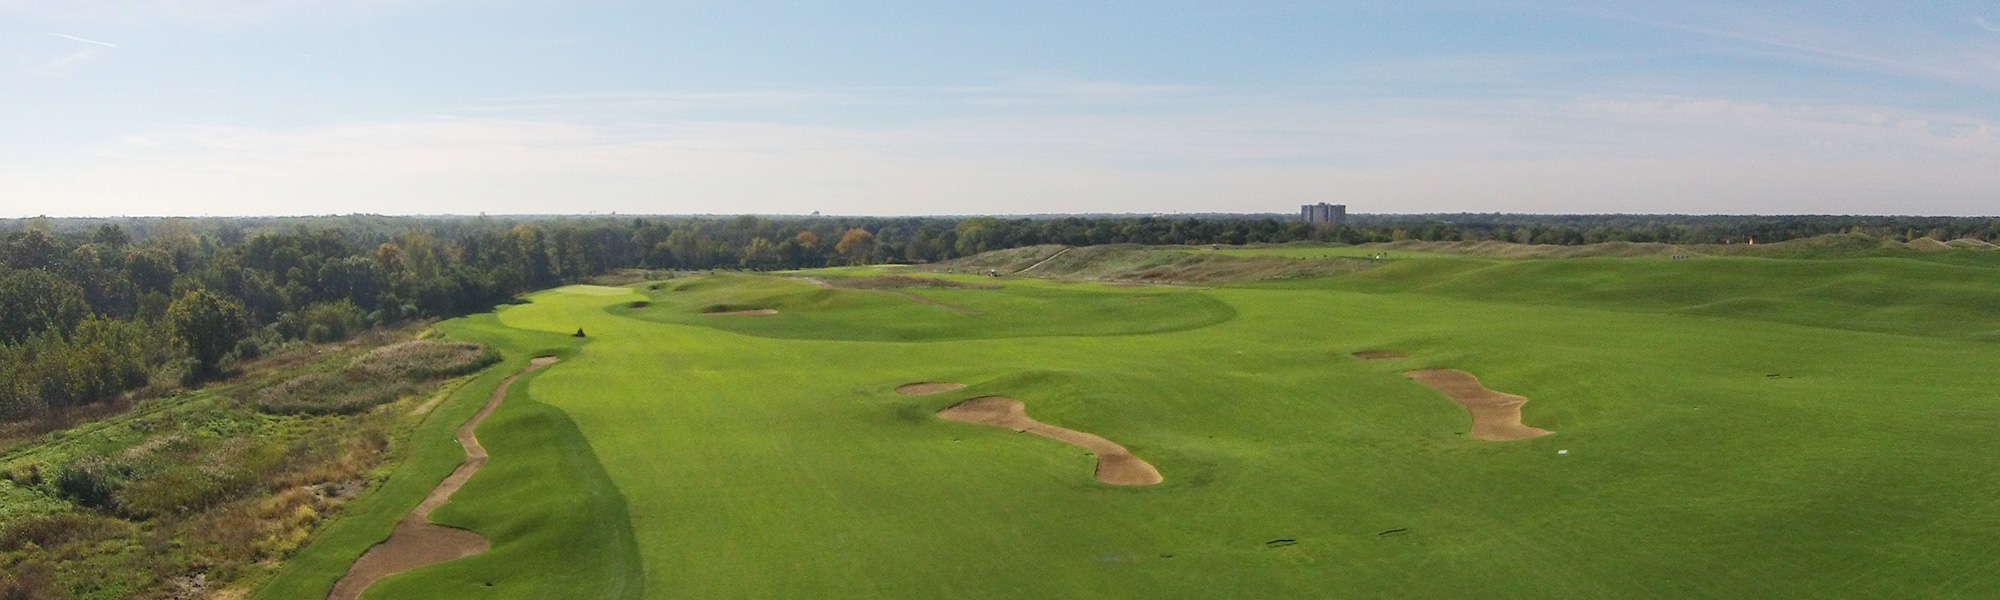
Hole #1
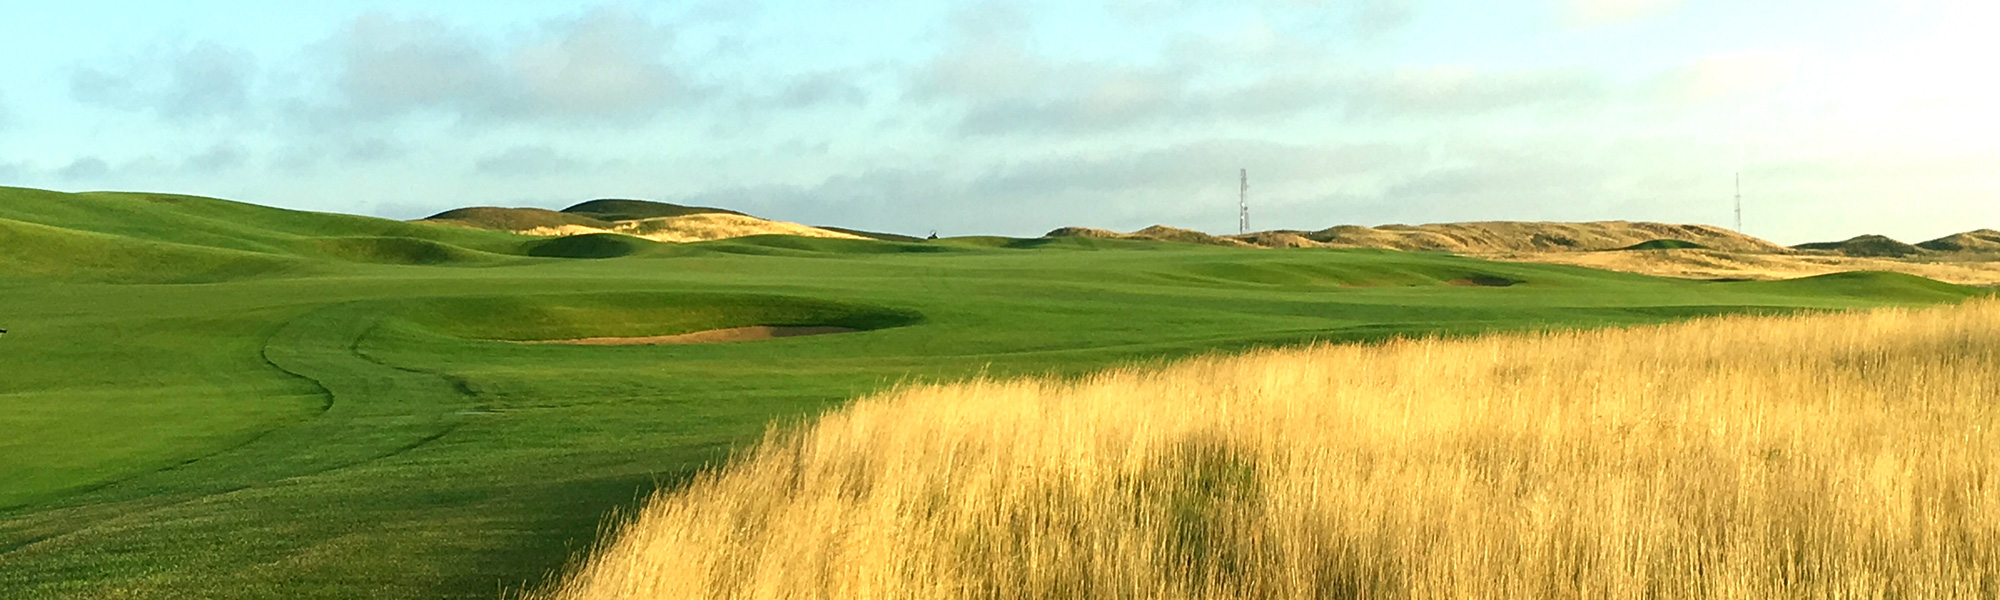
Hole #1
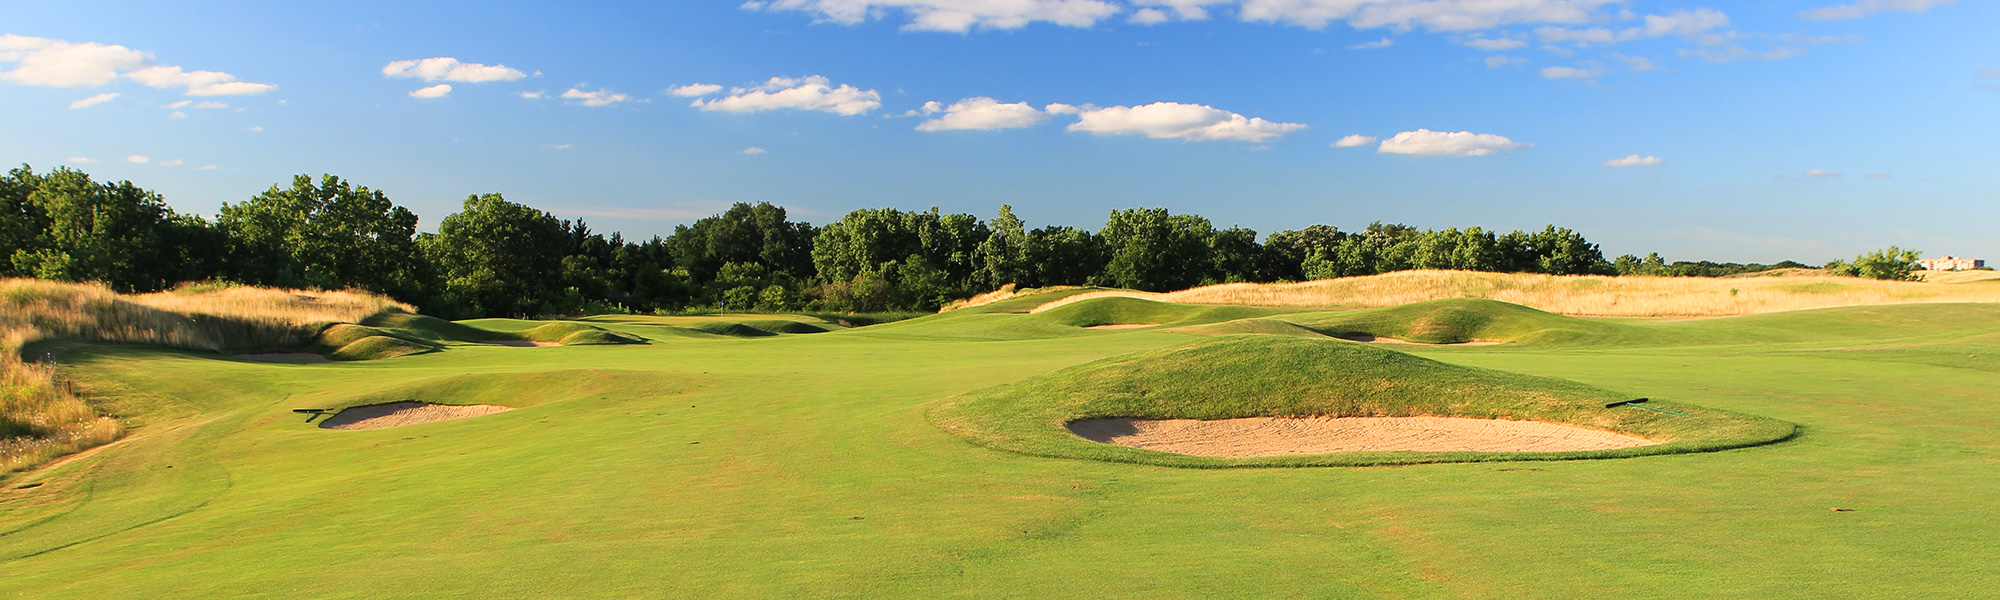
Your journey begins across a vast sea of green as the 1st Hole’s fairway partners with the adjacent 18th Hole’s approach. Strategically, this is no throwaway opening hole, as tee shots hit left risk finding one of two steep-faced hollows, while balls hit right both on the drive and approach will catch bunkers or bound down the bentgrass slope towards #18. With the closing putt, your southern view reveals the mystery of the “Highlands” in its grandeur and elegance, and welcomes you to the second hole with the classic links aesthetic of a green to tee experience.
| Black | Gold | Blue | White | Green | Orange |
| 461 yds | 433 yds | 397 yds | 371 yds | 348 yds | 320 yds |
Hole #2
Hole #2
Exuding spaciousness, power, and intrigue, the second hole poises your tee shot high above the fairway. Mind your ball flight to the right of the daunting 40-foot high hills that roll into a large plateau of a landing area. This dogleg right eventually gives way to an expansive fairway sloping down another 20-feet along the right-hand side following the approach. The key here is to allow the second shot enough space to work around the bluegrass “moat” guarding the green and save yourself from being distracted by hints of the Chicago skyline to the east.
| Black | Gold | Blue | White | Green | Orange |
| 484 yds | 462 yds | 434 yds | 409 yds | 380 yds | 328 yds |
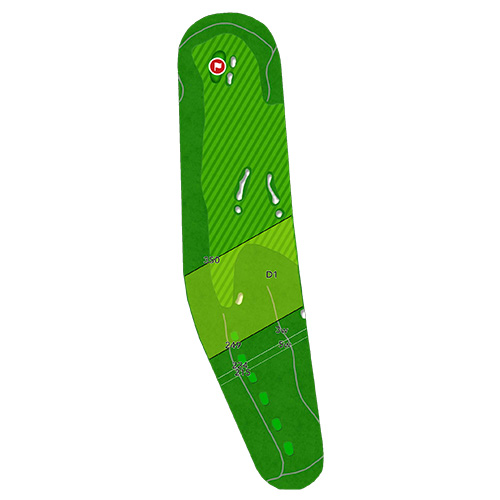
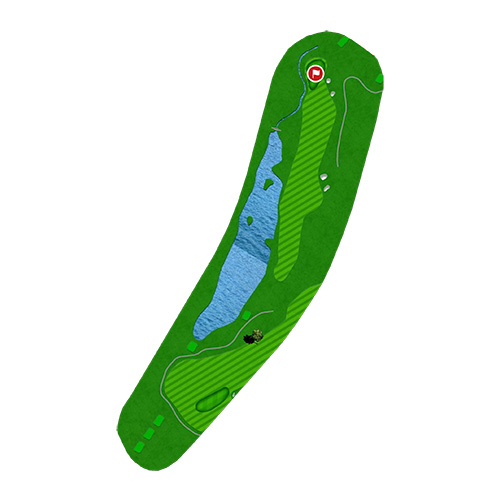
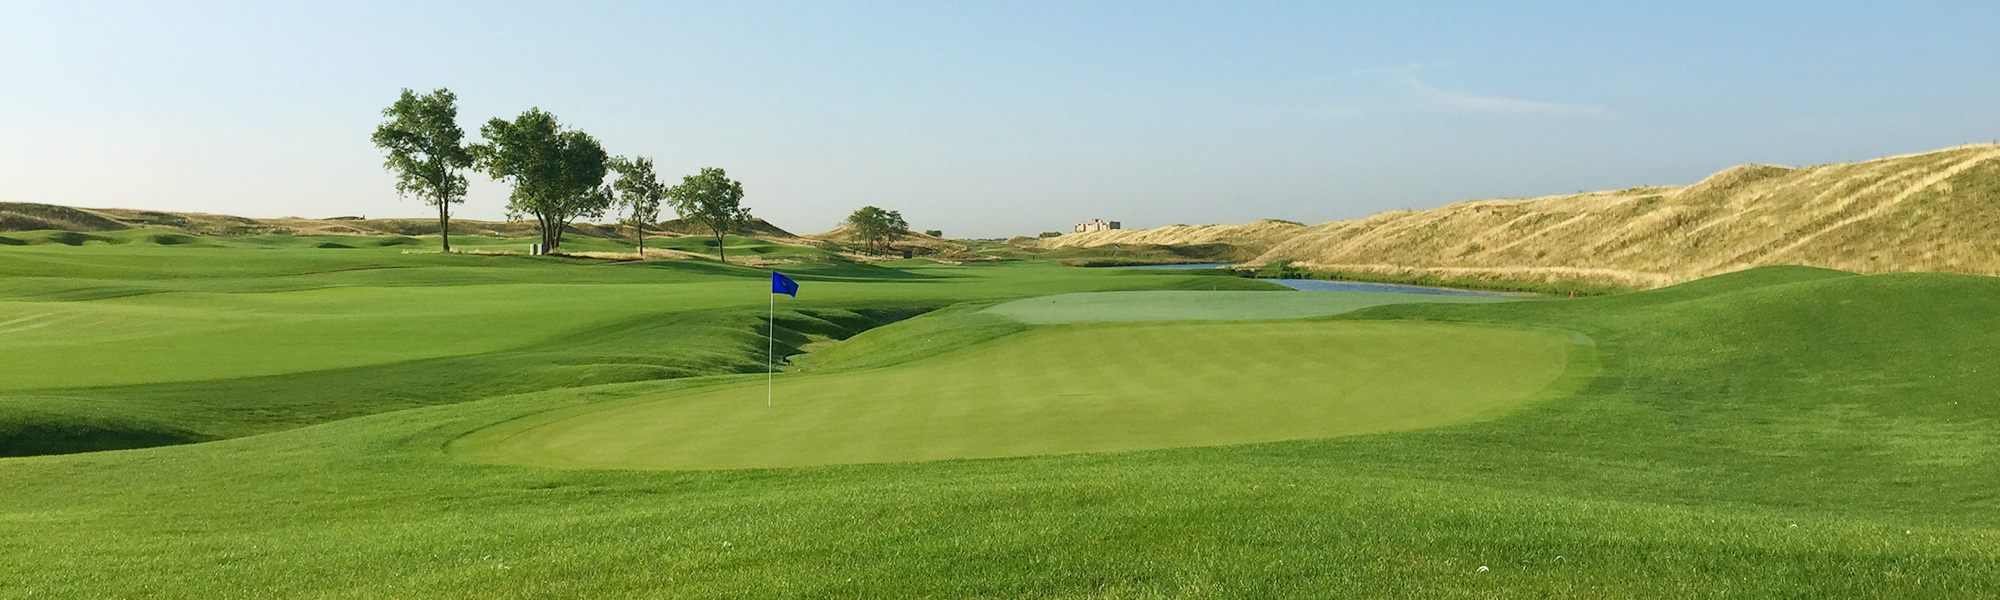
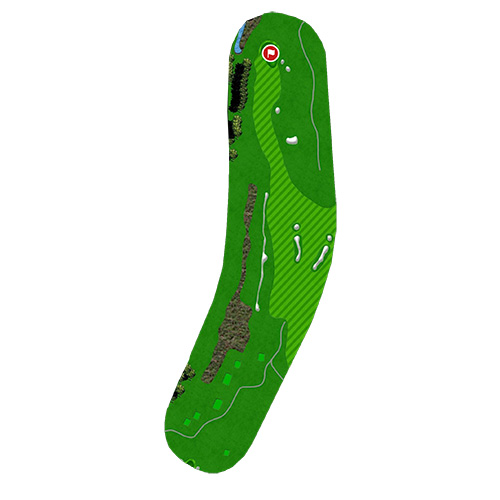
Hole #3
Hole #3
Where Hole #2 demands power, precision is the name of the game for this short par four. Flanked by prairie grasses on both sides, it is essential to favor the left hand side of the undulated landing zone to avoid the pencil thin bunker that runs across the northern half of the fairway. Fortune does not necessarily favor the bold for those who dare to use driver off the tee, as a devilish sand-faced bunker tight to the left guards the wedge into the hidden green. The relief here is provided by a small backstop behind the green, which ever so slightly slopes back towards the player on the approach.
| Black | Gold | Blue | White | Green | Orange |
| 389 yds | 380 yds | 362 yds | 334 yds | 305 yds | 267 yds |
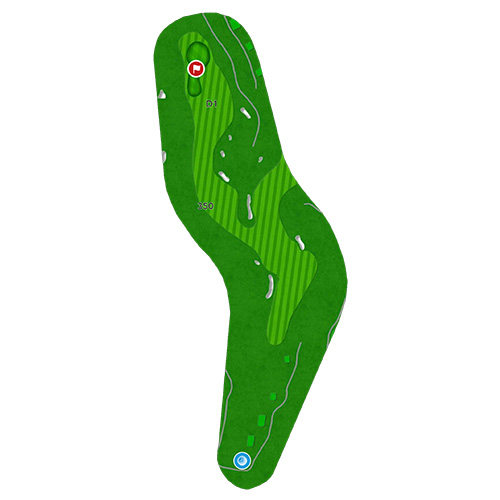
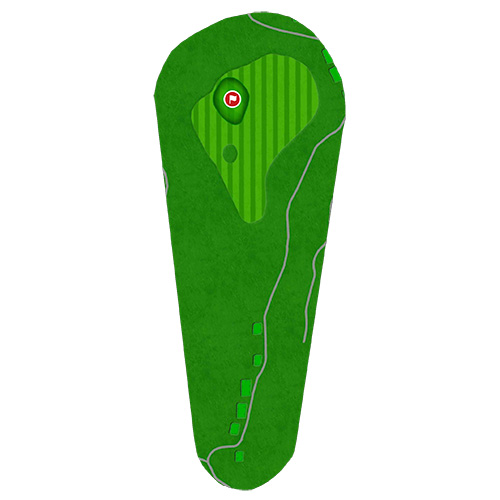
Hole #4
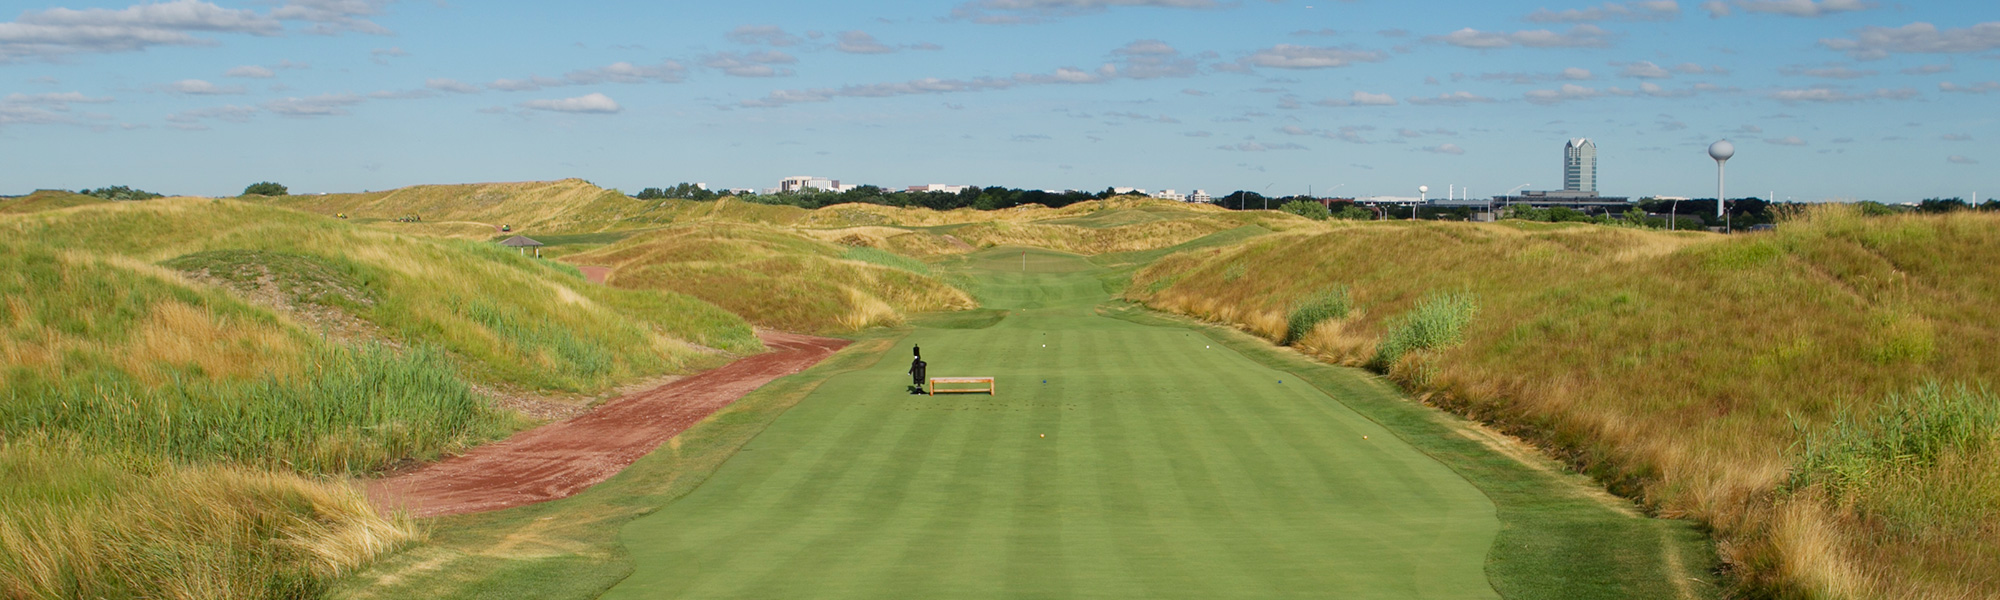
Hole #4
Dubbed “The Bowling Alley” by our membership, you’ll find yourself engulfed in a canyon-like chute that stretches over 250 yards from the Black Tees. As the rest of the world seemingly disappears stepping up to the tee box, rest assured that the initial 30-foot wide window does eventually open up to a green that is almost 200 feet in length, neatly protected by a modest bunker on the left. Provided you muscle-up a bit too much, the back tier of the green is raised to redirect those shots to dribble back down towards the center shelf.
| Black | Gold | Blue | White | Green | Orange |
| 243 yds | 215 yds | 200 yds | 179 yds | 167 yds | 130 yds |
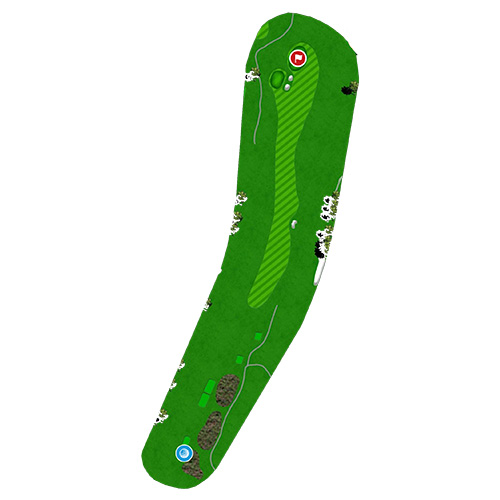
Hole #5
Hole #5
The first par-5 of the course secretly provides one of the better opportunities to make birdie on the front nine. While a clean tee shot to the left-center of the fairway is key, there is some relatively non-penal bailout room short and left of the green for the final approach. Be advised- while this dogleg right may appear fruitful to the western end of the hole, the few trees along the ridge are swathed in tall prairie grasses.
| Black | Gold | Blue | White | Green | Orange |
| 531 yds | 523 yds | 499 yds | 463 yds | 439 yds | 420 yds |
Hole #6
Hole #6
Keep in mind the mantra of “short is better than long” for this downhill par-3. Deep set bunkers on the lower right hand protect the green from those who block it off the tee, while two subtle bunkers on the left leave it shallow enough for the player to get out and run a shot downhill towards the hole. Almost all shots long of this green are surely to be lost, as a severe slope runs off into thick fescue.
| Black | Gold | Blue | White | Green | Orange |
| 207 yds | 198 yds | 175 yds | 157 yds | 130 yds | 115 yds |
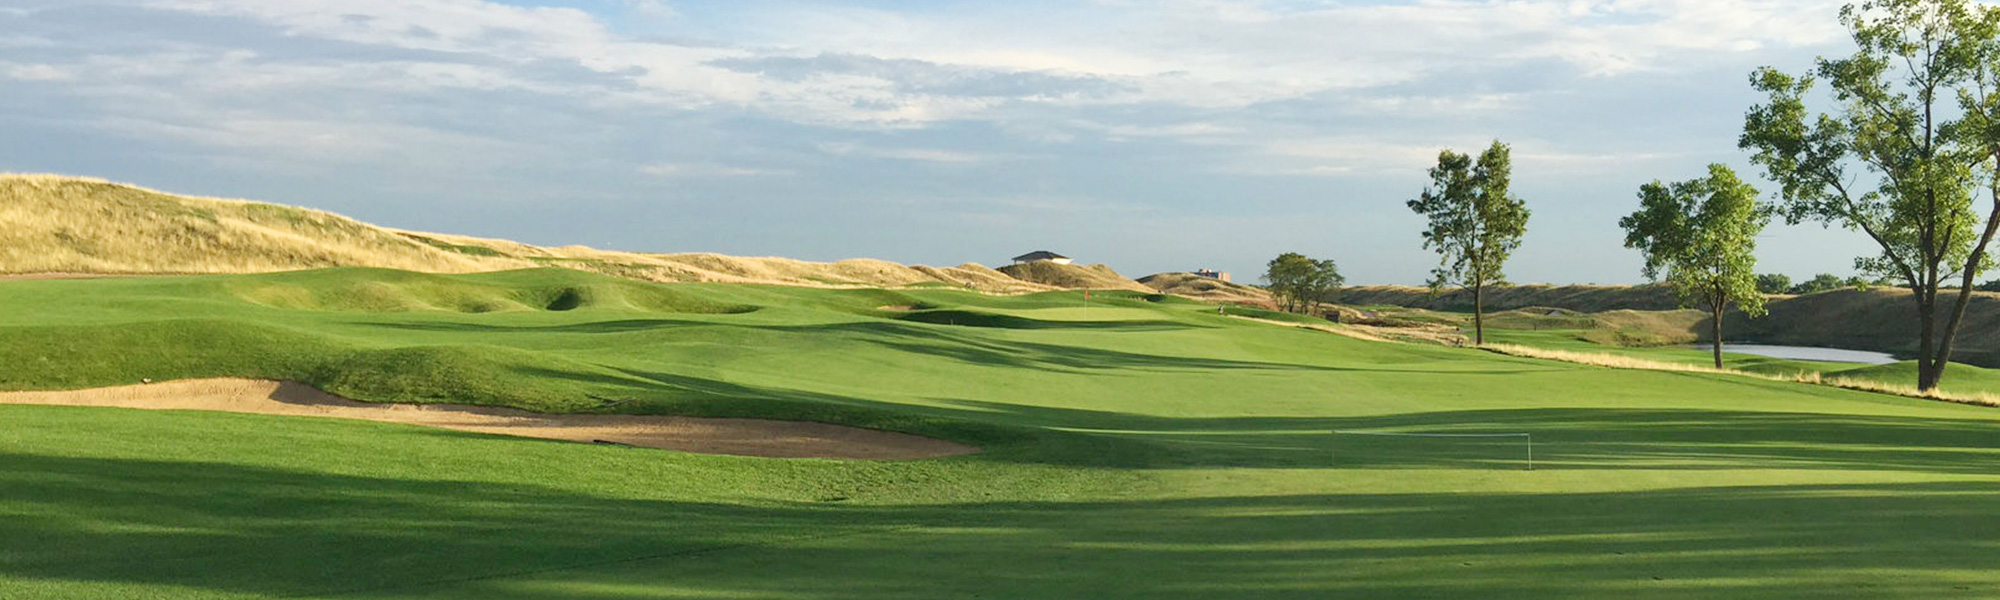
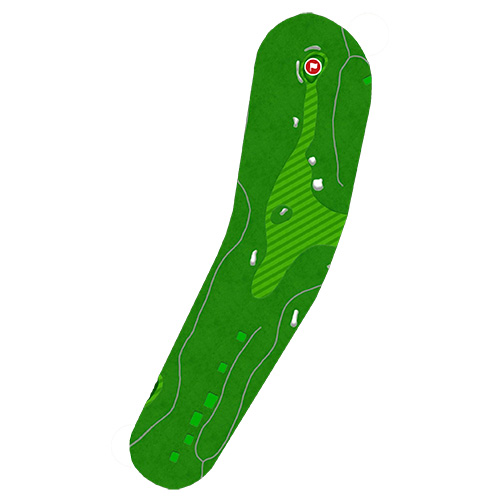
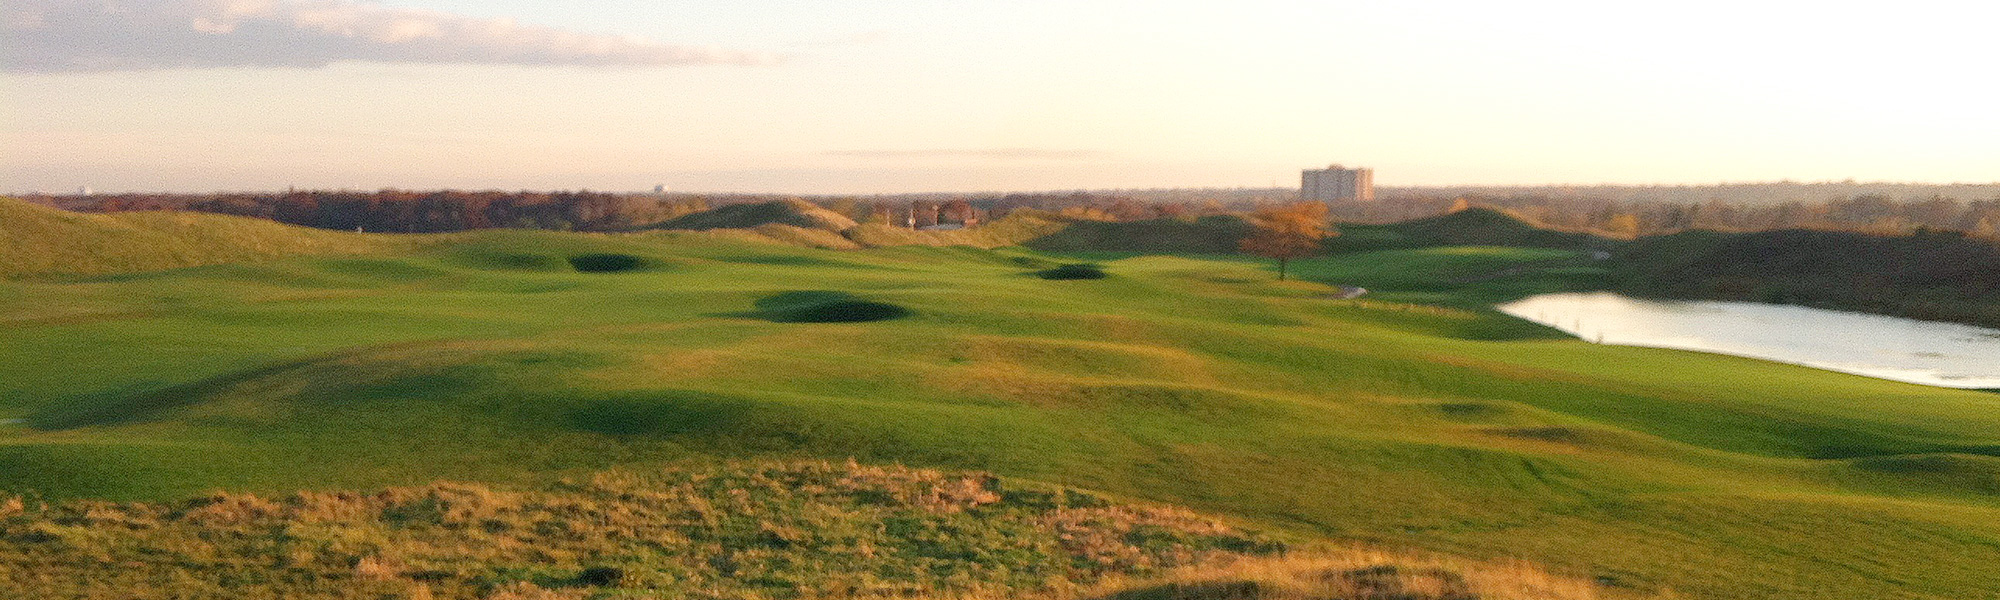
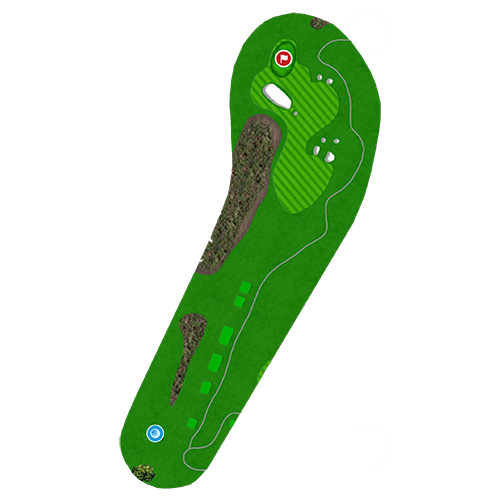
Hole #7

Hole #7
The behemoth of the course. While Hole #5 was relatively easy to reach in two, #7 definitely is not. A gorgeous fairway framed and turned by massive hills, then split by bunkers, provides plenty of strategy in terms of shot placement. Make sure to place your tee shot to the right of the western ridgeline, and then trace your second shot along the left and over the center fairway bunker. The maw of the beast poses a 17,000 square foot green that spans 230 feet from front edge to back.
| Black | Gold | Blue | White | Green | Orange |
| 615 yds | 566 yds | 537 yds | 507 yds | 473 yds | 422 yds |
Hole #8
Hole #8
Beware the fairway bunker directly in your sightline to the green, as your drive should fare right of this devious little trap. The landing area is unique in itself being sunk in a bowl with the bentgrass fairway trickling down from the adjacent 7th Hole. Down in the bowl, a perched green awaits with bunkers to the back & left, and a 40-foot wall guarding the right-hand side.
| Black | Gold | Blue | White | Green | Orange |
| 432 yds | 409 yds | 385 yds | 362 yds | 325 yds | 290 yds |
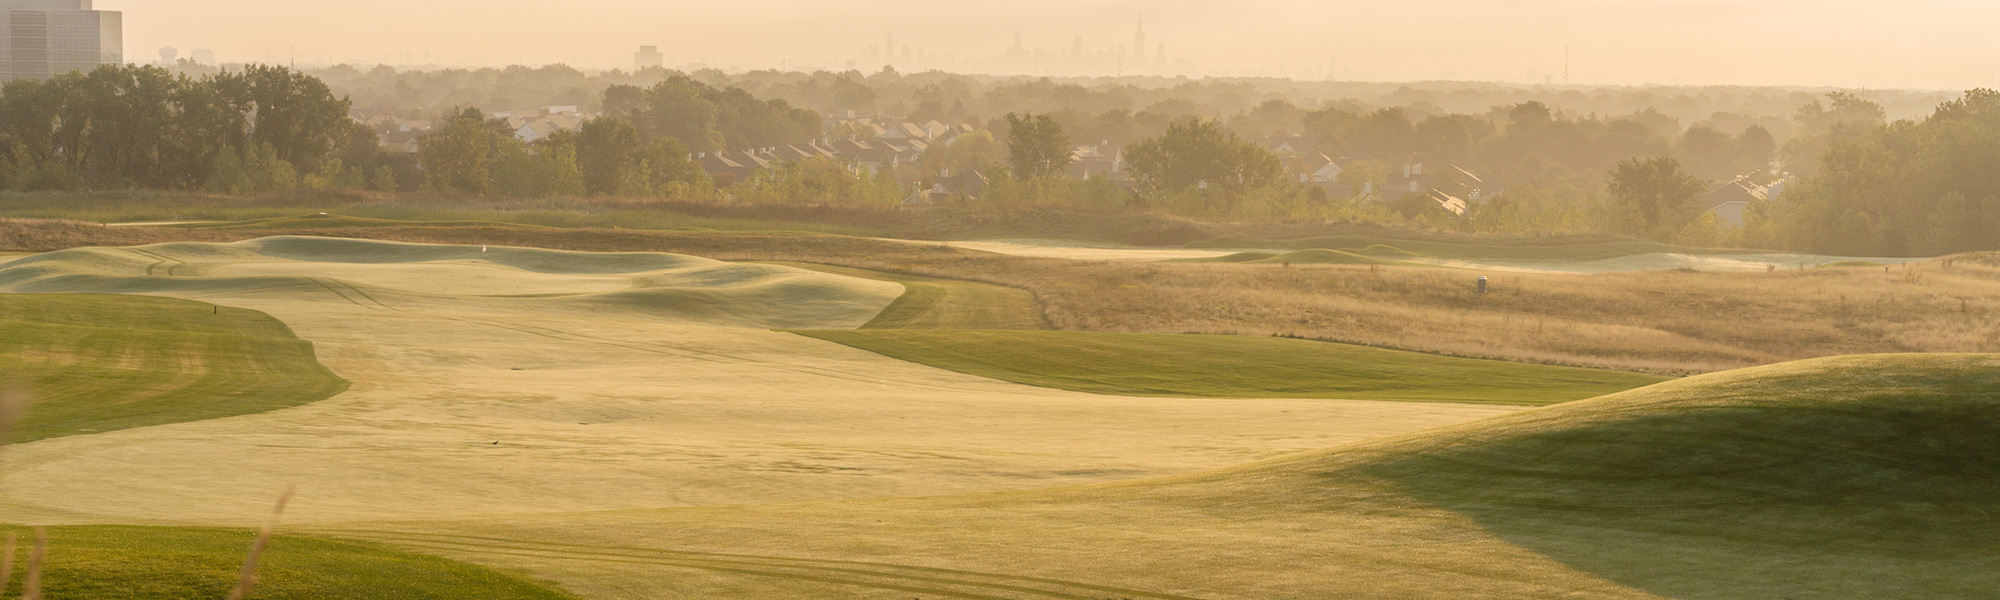
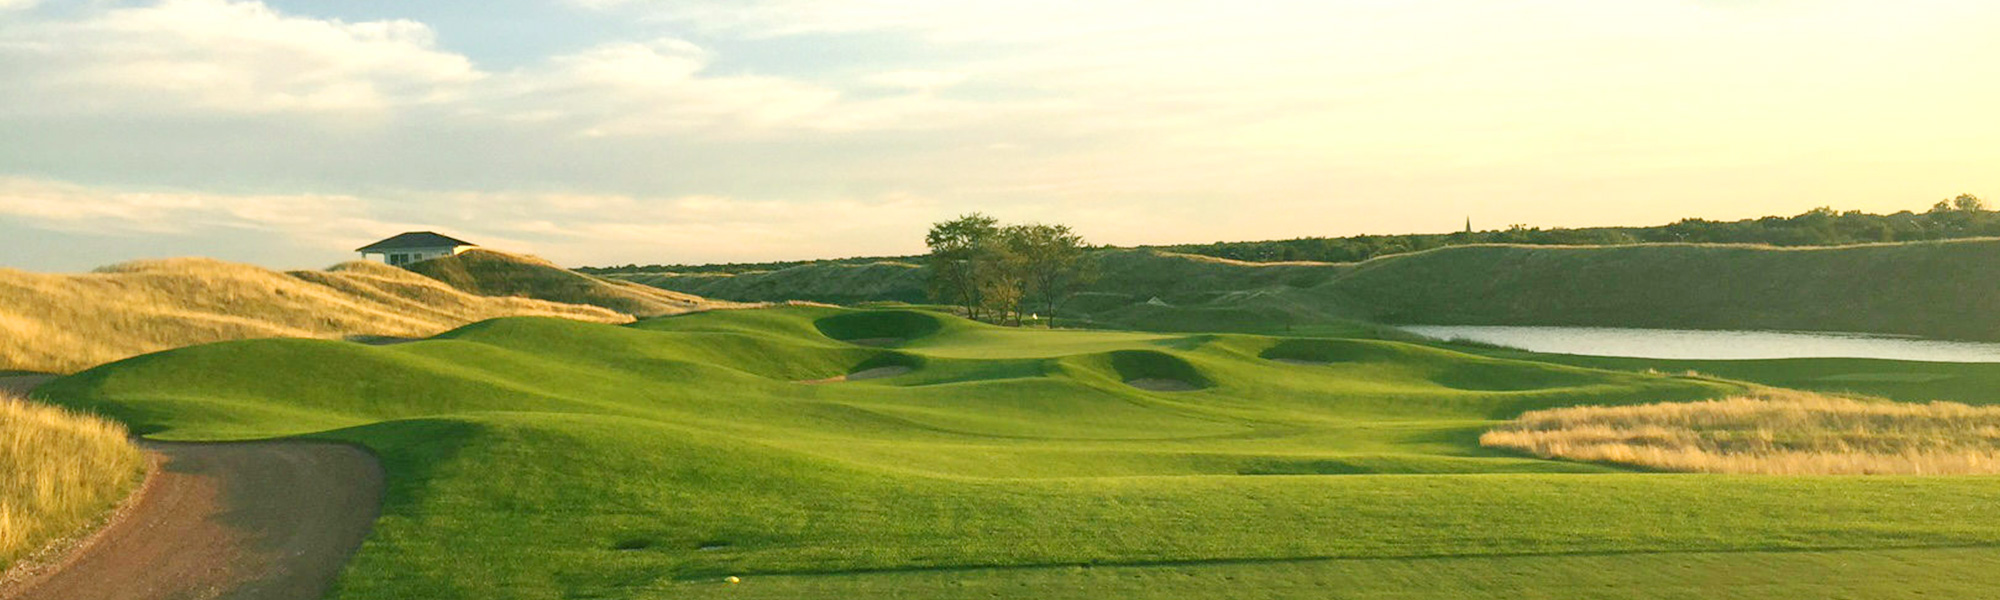
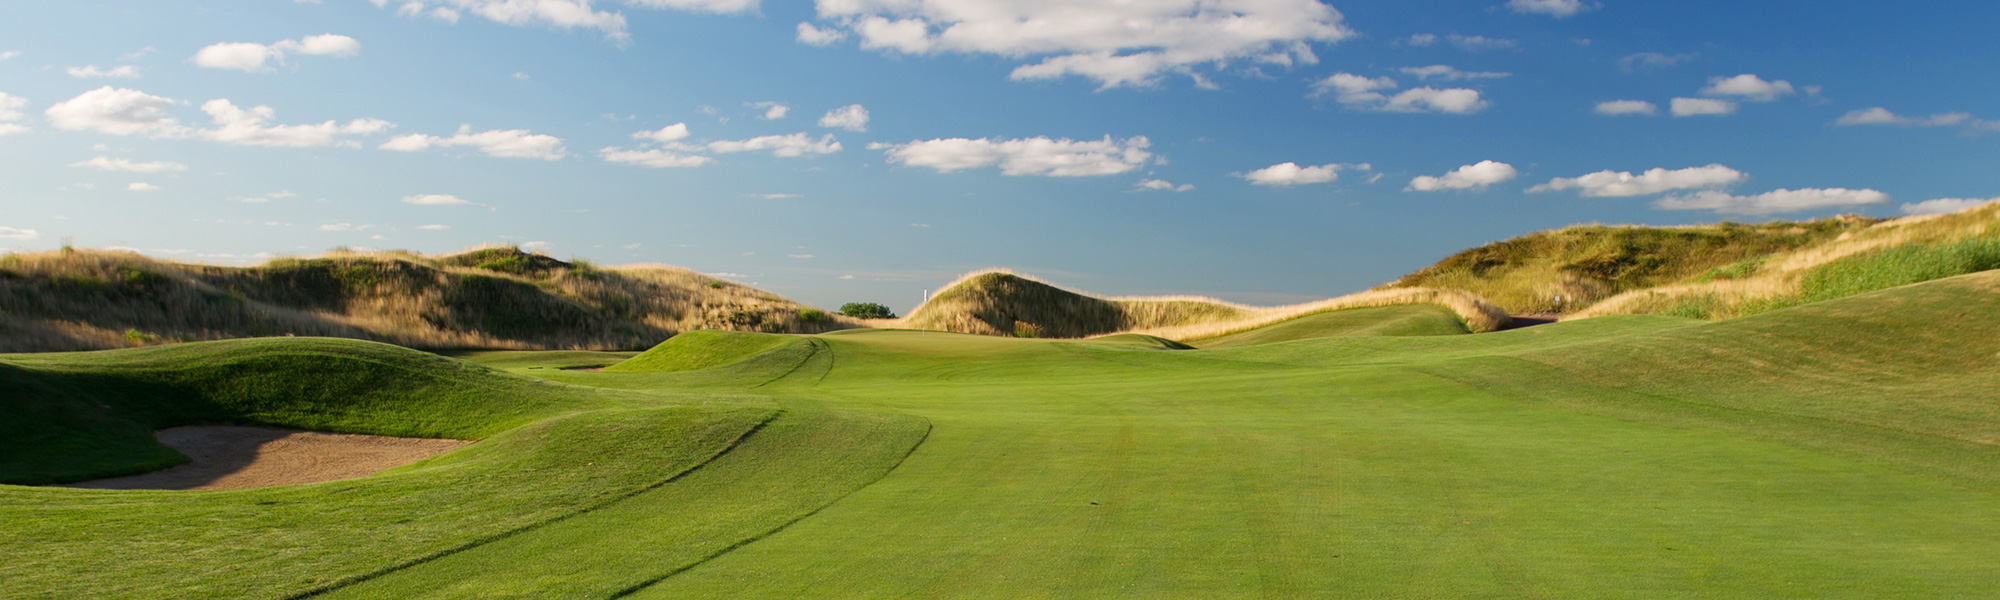
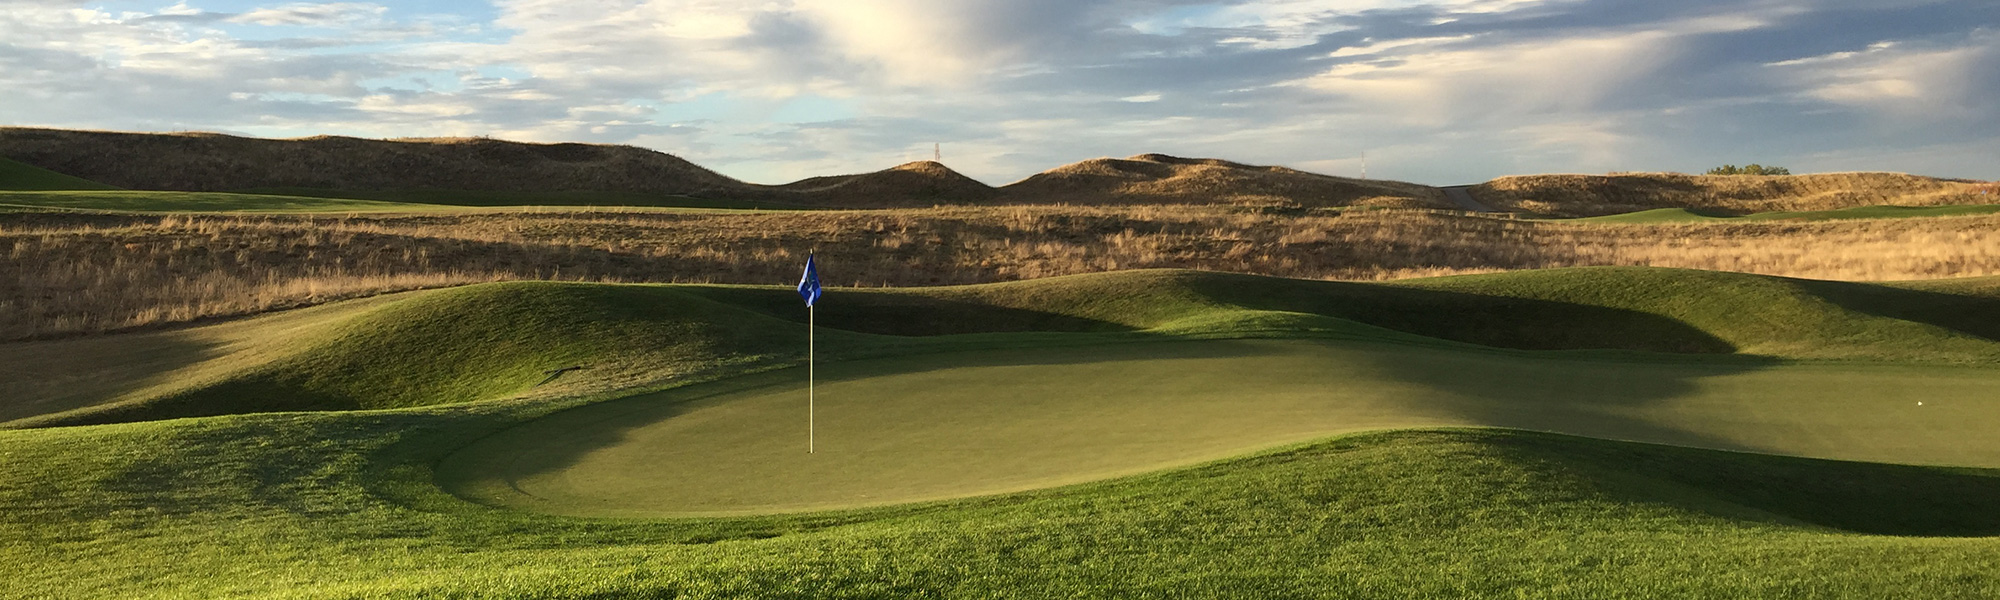
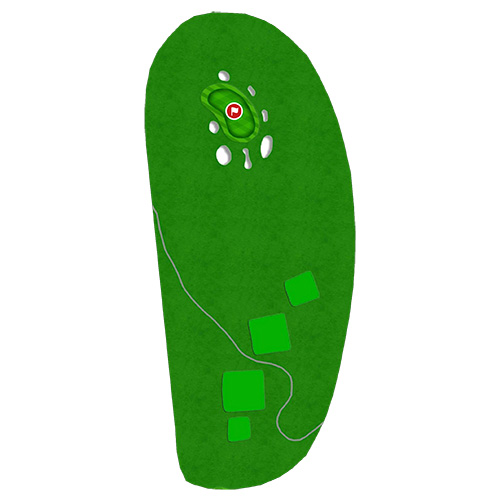
Hole #9
Hole #9
Set on one of the highest points in the Chicagoland area and the signature hole of the course, the uphill 9th Hole seemingly never drops off. Short left is simply a no-go, as it is protected by a deep, cavernous bunker. A miss to the right up the hill leaves you with a 20-foot high chip shot up the bentgrass. The reward, you ask? A putt you won’t soon forget with the Chicago Skyline spanning out in front of you to the east. Don’t just take our word- this was Golf Digest’s Hole of the Year.
| Black | Gold | Blue | White | Green | Orange |
| 344 yds | 316 yds | 288 yds | 276 yds | 250 yds | 220 yds |
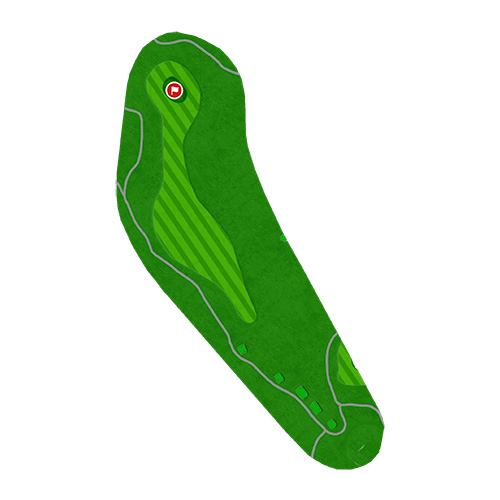
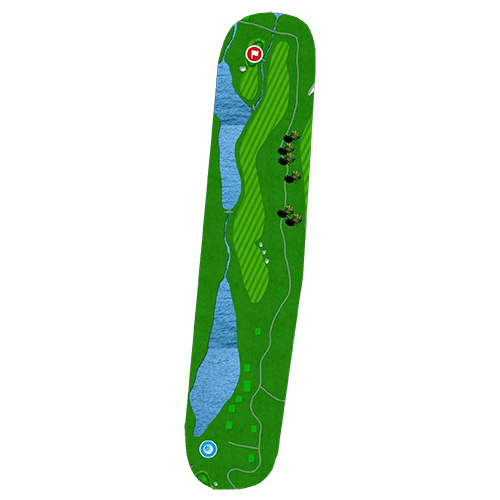
Hole #10
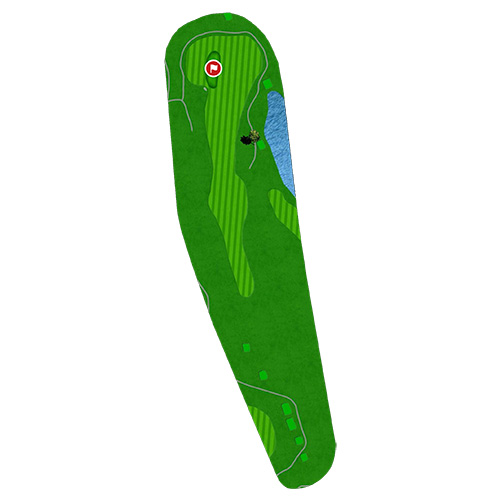
Hole #10
The turn at Chicago Highlands routes you around the perimeter of our track, and Hole #10 gives you a taste of the imminent challenges approaching. A longer downhill par-4 greets you and continues a wonderful sequence of rhythmic and stylistic changes from one hole to the next. While the three grass black holes in the fairway may seem daunting at first, place your tee shot favoring the right-hand side to give yourself the best position for the approach. A narrow, mono-sloped green towards the pond greets you thereafter. Don’t find yourself on the high side here!
| Black | Gold | Blue | White | Green | Orange |
| 478 yds | 459 yds | 437 yds | 417 yds | 373 yds | 336 yds |
Hole #11
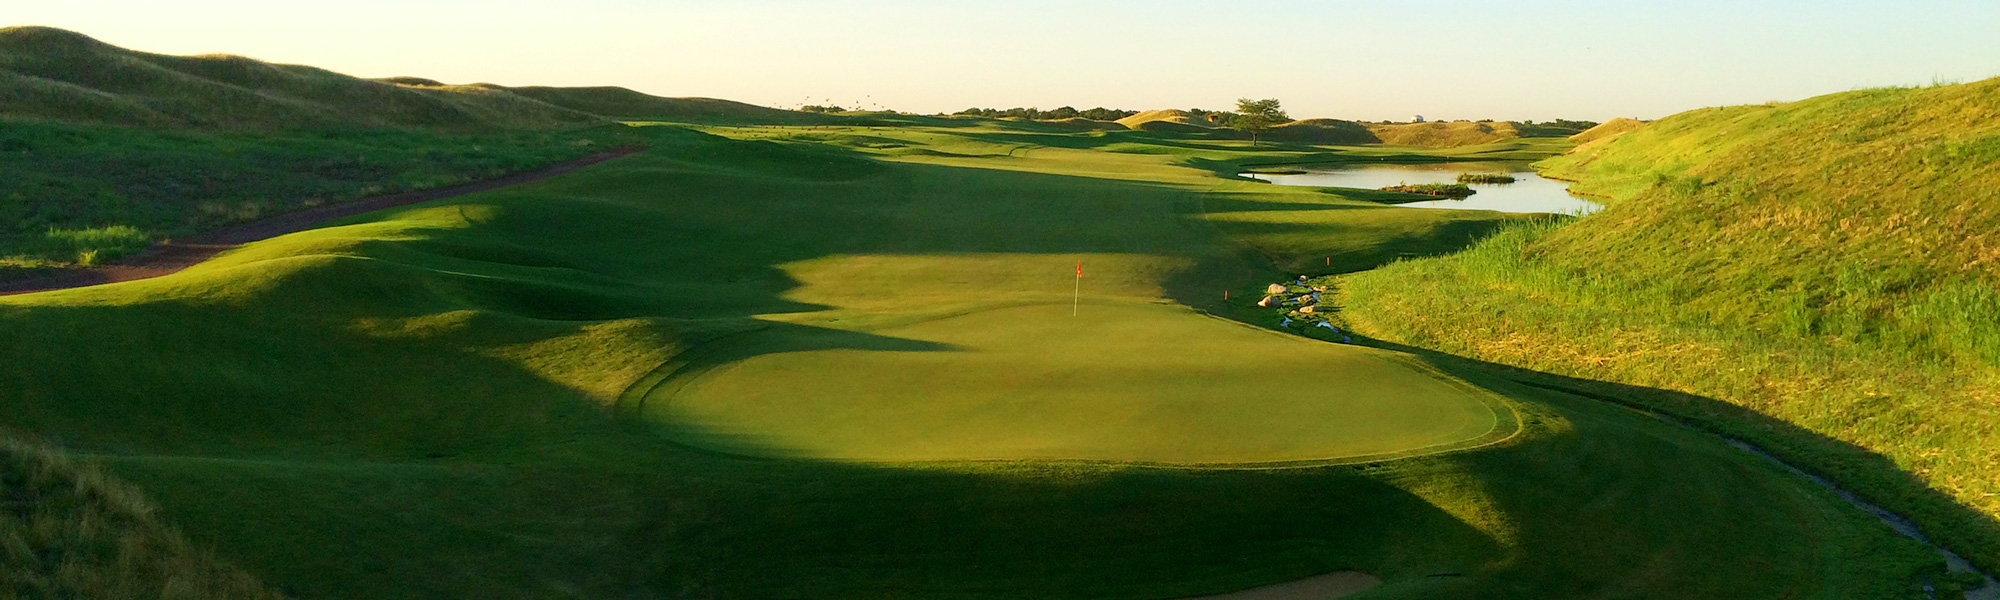
Hole #11
The stretch begins with a wildflower-laden valley complemented with 30-foot high hills dipping down into a calm, reed-filled pond. While similar in length to Hole #10, the difference here is aiming directly for the bunkers adjacent to the pond. This leaves you with an ideal approach to the modestly undulated green. Be vigilant, though, of the hidden bunker behind the green. A fly-out is sure to be a challenge you won’t deem welcomed.
| Black | Gold | Blue | White | Green | Orange |
| 479 yds | 461 yds | 421 yds | 397 yds | 365 yds | 301 yds |
Hole #12
Hole #12
Two sets of back tees were created on this hole simply because we couldn’t decide which we liked better. The second of the valley holes is a par-5, and while reachable in two, is masqueraded with beauty. Place your tee shot delicately to the left of the fairway bunkers on the east end of the hole to set yourself up with an ample opportunity to reach the green in two. Don’t be fooled, though, by the doormat to the green. It’s guarded by two small streams that will not let the short shot be forgiven. The dancefloor to the hole runs laterally along the creek, so high and right is not a bad option to take for those seeking the safe way.
| Black | Gold | Blue | White | Green | Orange |
| 576 yds | 563 yds | 501 yds | 468 yds | 444 yds | 394 yds |
Hole #13
Hole #13
Set high up into the colorful hillside, this time looking over the quiet stream to your right and interspersed with wildflower covered land bays out in front, this hidden par-3 greets with you with enigma. Beyond the splendid bluegrass hills hides the downhill hole protected by two bunkers on the right-hand side. An errant shot into the bowl usually forgives the player and grants them access to using the flat stick, but don’t expect your roll to be straight home thereafter. This undulated green does not grant open up to the faint of heart.
| Black | Gold | Blue | White | Green | Orange |
| 233 yds | 193 yds | 183 yds | 166 yds | 150 yds | 130 yds |
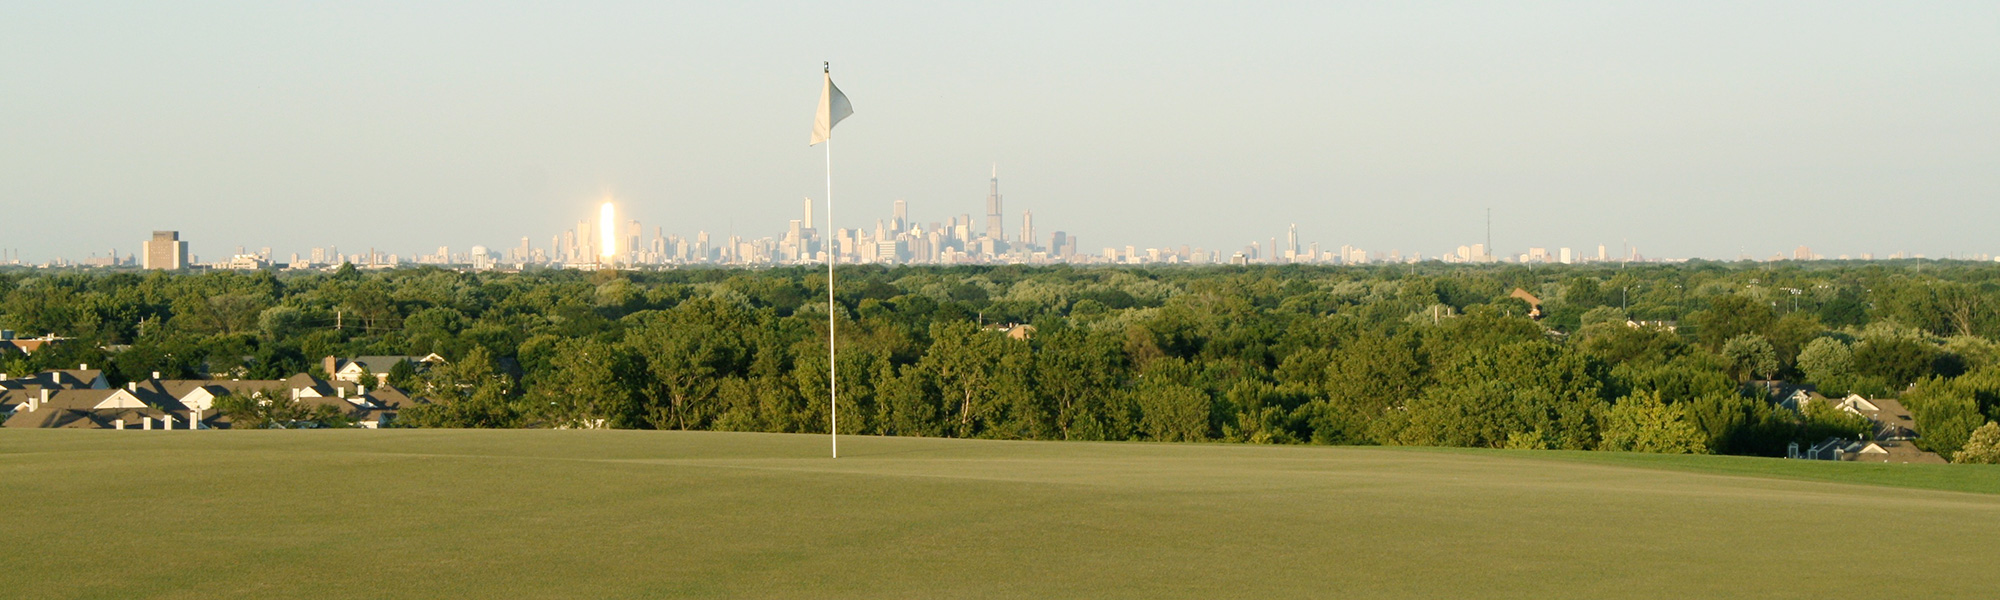
Hole #14

Hole #14
If hole #9 were to have a protégé, this would surely be the heavy-weight contender. The striking view of the Chicago skyline directly in line with the green, huge native grass hills on all sides, hillside bunkers on the right, fairway moguls down the center, and a massive wetland spanning the whole northern end of the hole make this a visual feast. For dessert? Aim your tee shot directly at The Willis Tower. The drivable green sets up wonderfully from the fairway and funnels all shots to the center spine. Stay frosty, though, as the untamed grass off the back can easily gobble up thin or blasted approaches.
| Black | Gold | Blue | White | Green | Orange |
| 363 yds | 311 yds | 287 yds | 261 yds | 228 yds | 216 yds |
Hole #15
Hole #15
One of the few holes where out-of-bounds becomes a slight possibility to the left. A strong and solid tee shot is absolutely necessary here, as the longest par-4 of the course demands that you eat your Wheaties for breakfast. Trace your drive alongside the edge of the right-side fairway bunker for the best angle to the green. There is some room for bailout to the right of the green, and a two-putt par here is cause for celebration.
| Black | Gold | Blue | White | Green | Orange |
| 519 yds | 505 yds | 450 yds | 432 yds | 385 yds | 351 yds |
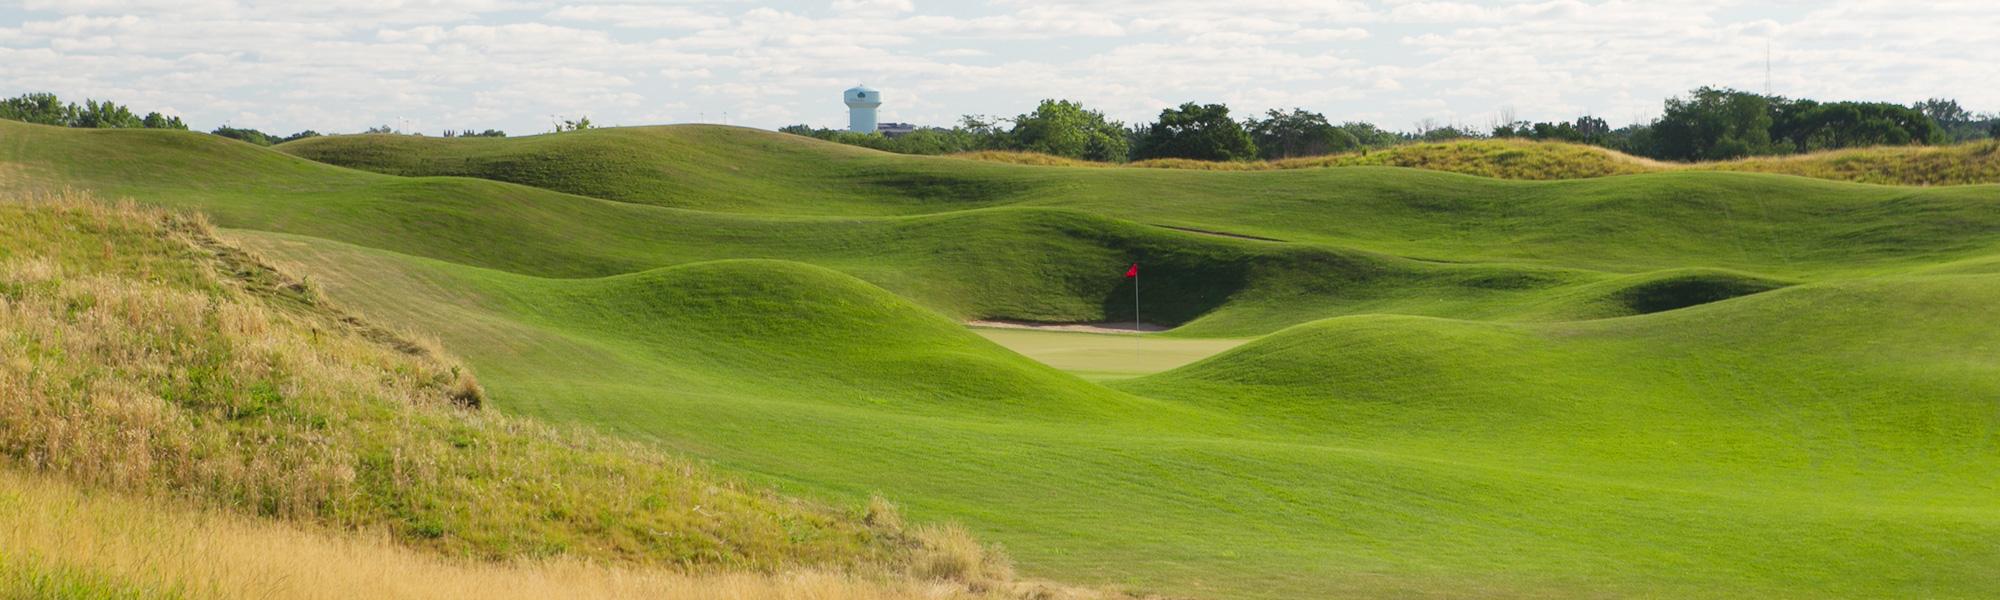
Hole #16
Hole #16
This rather short par-4 is another great “balance-creating” hole to complement the grind you took on Hole #15. The elevated tees give a great view to the ideal avenues created by rolling hills and fairway bunkering on both sides of the fairway. Don’t be intimidated by the bunker placed smack in the middle, a drive right over this roadblock leaves you with a pleasant approach to the kidney-shaped green.
| Black | Gold | Blue | White | Green | Orange |
| 405 yds | 389 yds | 374 yds | 354 yds | 327 yds | 285 yds |
Hole #17
Hole #17
Where your last par-three was framed tightly by the surround hillside, you are now presented with a green set in a broad, open prairie expanse. This two-tiered green may appear easily accessible being the shortest hole on the course, but the word diabolical comes to mind once the dreadful sight of 7 deep, small pot bunkers drift into sight.
| Black | Gold | Blue | White | Green | Orange |
| 158 yds | 143 yds | 134 yds | 116 yds | 107 yds | 94 yds |
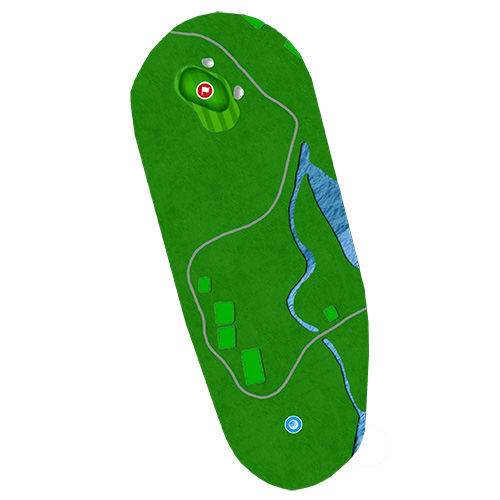
Hole #18
Hole #18
As all good things must come to an end, your round is encapsulated with a beauty of a par-5. The bentgrass expanse of Hole #1 comes into full view from the tee box and is majestically contrasted by the expansive wetland to the left. A narrow strip of sand trickles along the wetland side, while serving in turn as a mediator between the wild beauty on the left and refinement on the right. Angle your tee shot alongside of the fairway bunkers on the right and keep the ball towards the side of the clubhouse for best look on your final descent to the peninsula green. Putt out, and the clubhouse is only a few steps away to recollect on one of Chicagoland’s finest gems of a golf course.
| Black | Gold | Blue | White | Green | Orange |
| 573 yds | 540 yds | 516 yds | 477 yds | 450 yds | 430 yds |